Showing posts with label Visual Response. Show all posts

Thursday, 6 April 2017

Animation Artefact - The Final Result - TOUCH

I decided to call my animation 'Touch', I wanted something simple and memorable and this targeted to message between touch screen and real touch. I did multiple takes of some of the scenes so that I could pick the best version in the editing stage, which now I am really happy about as some of the scenes weren't as good as the later versions I shot.

After putting all of the footage I had together all I needed was my final sounds and some of them I recorded myself as this way I could get the exact sounds I wanted and they are mine without copyright. I voice acted the gasp and little 'hmm' at the end of the animation and them sped them up to sound more high pitched. I found that this made them sound really cute and in keeping with the animation. I also put titles on my animation so that it made it more professional and the audience would get the word 'TOUCH' before watching and hopefully this would be thought provoking. 

Below is my final animation!

TOUCH from Stacy Straub on Vimeo.

Overall, I am really happy with the outcome of this animation. I think it went really well and I feel like there is a clear message within the animation like I planned. I now want to get a bit of feedback on it so my next steps are to get some written feedback from my peers and see what message they got from it.

Animation Artefact - Animating!

Animation begins! As I had an animatic ready and a solid storyboard it was really easy for me to just go in and animate straight away without any problems. Below is my little baby on set, I put a diaper made out of tissue on him so that we wasn't naked anymore. Also, I taped down the tea towel the best I could before started to animate to try and prevent movement.


Above is little Jack with his pile of electronics in the process of being animated. The main thing I struggled with, within this animation is the movement of the tea towel, because I wanted a completely tactile set I didn't realise the drawbacks this could have. I had only used a solid set before and not a material based one and there was lots of movement with it even though I wasn't actually touching it that much. I feel that this is one of the negatives you get with using this kind of background and the only thing I could really do would just to be really careful every time I leant on it. Even though there was movement, this is one of the main charms/flaws that happen within stop-motion, and one of the things I explored within my essay. So, when looking back at the footage and seeing these flaws it makes me think now that it could even contribute further to the ideas I explored in my essay and the message I am trying to convey within this animation. I am really happy with the way that the scenes have turned out and below is a little preview of one of the scenes. I can't show any moving footage yet as I have to export everything as an image sequence to then put together in Premiere to ensure I get high quality frames.

Animation Artefact - Finalising Props & Background

I started out by creating the little teddy bear for this animation which was so tiny! Luckily I have small hands so I managed it, but it wasn't easy to make. I made him out of wool as I wanted him to be a completely different texture to my main character. I began by cutting two balls of foam and a tiny piece of wire and I wanted him to be quite sturdy, so this was his base.


Next I glued an put together his body before I began with the needlefelting and as you can see compared to my hand he was very, very small. The main thing I struggle with was his arms and legs as there was so little foam to poke the wool into it was hard to get the arm to go together without the foam falling apart.


Eventually, after lots of struggling with tiny arms and a leg, he came out really well! I made a plasticine version before this as you can see in my animation tests, however he looks so much nicer in felt.


Next, I began making the tiny iPads and laptops. These again were very small, however they weren't as hard to craft. Below is a tiny iPad, I made quite a few of these.


Then I made some tiny laptops.


Here is some of the electronics with the bear, I did make a few more so that the pile would completely cover him for the animation.


Next, I had to get a background! Originally, I was going to get a baby blanket, but I felt this would be a waste as I would never use it again! So, I instead bought some microfibre tea towels, that are really soft looking and I found pink ones! So, I could use this in the future as well as for my animation. I tested the colours mainly pink with white stripes and white with pink stripes as these were the different patterns I had.


I decided on pink with white stripes was better as the white background seemed a bit off with the skin colour of the baby and the pink made him stand out more.

So, now with all my props made and background sourced, I am ready to animate!

Animation Artefact - Storyboarding and Animatic

Before going on to creating my animation I needed a storyboard and animatic to follow, even though the animation is quite short. I still felt it was necessary as I needed to know the timings for shots before working out how many frames were needed. I found creating the storyboard to be quite easy as I had a solid idea of what I wanted to do and the narrative was really simple.


I tried to make the shots as simple as possible as it is a stop-motion animation and with the facilities available there can't be too much camera movement. With the zooms I am going to fix these in post-production and shoot them all in wide shot. I really want to play on the textures in this animation, and after the peer review I am now on the lookout for a fuzzy cute backdrop to contrast with the plasticine I am using for the baby and the electronics.


Above is the animatic I came up with before going into animate. I thought a lot about the sound for this animation and I decided that it would be most effective if there wasn't any music and instead was just a room ambience and this works better. I want to use a textural soundscape within this animation so that it accentuates the message of the tactile nature of stop-motion. For example, I am planning on making him stroke the bear once he pulls it out and I want a foley sound of material rubbing on itself to make the bear seem even more realistic. I feel that by using sound in this way it will really help to bring the animation more to life instead of sticking some music over the top. Even though the animatic is 15 seconds, I don't feel like my final animation will be this long as I have left some long pauses in the zooms, which may come out a little shorter in post. I'm really happy with the way that it has turned out and now my next steps are to begin animating!

Monday, 13 March 2017

Animation Artefact - Progress!

As I realise I don't have much time to create a full animation I have really been cracking on with this part of the module and after speaking to Richard about my idea he fully supports it and thinks it's simple yet effective, which is great news for me. So, with that comment I carried on planning my animation and I have began by drawing designs for baby Jack, below are all of my sketches and plans.


FINAL DESIGN I LIKED


I thought it would be really fun to look at character design with plasticine and actually just made different faces with Newplast to experiment and it went really well! I thought it would be a fun activity to practice sculpting with the material as well have it as a material consideration as I had originally planned to use a felt puppet for this animation. Although, after playing around with plasticine I actually think it could work better as I am trying to make this animation as tactile as possible and when taking photos of my model you can really see the details and the errors, which just makes it even more charming and possibly more charming than felt!


I liked this face shape the best, however I felt the eyes were a little creepy and it reminded me of Coraline! So I decided to make them smaller and put a rough body onto it so that I could get a concept model before making the final thing.


More images of my concept model.


I really love how this has turned out and I think it really captures the handmade feel of stop-motion puppets! I don't want to overcomplicate my puppet as the plasticine can get very gooey when under lights and handling him so I feel like simple hands and feet like the ones above will work better and I can shape them back to as they are here quickly and effortlessly.

I also did some little animation tests to see how he would move and the clip is below.


Baby Testing - Stop Motion from Stacy Straub on Vimeo.


This little test took no time at all and I did it using my iPad at home, however it has helped me decide that I definitely want to use plasticine for this animation! My next steps are to create a wire armature to put inside the plasticine and it was hard the move the head of this character very much as I felt it was going to break off. I also need to design the little soft toy and iPad props used in the animation.

Wednesday, 27 April 2016

COP Visual Response - Animation Evaluation


Here is my finished animation as visual response to COP1 called 'Sabella' :)

My aim was to create an animation that tackled the subject of gender in animation and how it is represented, so I wanted to play with the idea of Disney Princesses.

In this animation I have created my own Disney princess Sabella, and it shows her walking home to her cottage and once getting inside revealing her true self to the audience. I wanted my message in this animation to be series, however I still wanted it to have that quite comedic effect to it as well. I used a Disney soundtrack for the first part of my animation to really establish the atmosphere and late used a heavy metal track to show the funny side to things. 

Tuesday, 19 April 2016

Title Cards in Disney!

As part of my animation I wanted to spice it up and really make it feel like a Disney animation and when going to make titles I thought of just putting the plain white text on a black background but then I thought back to Disney's beautiful titles card that they use. I thought that it would be fun to recreate some of my own by using inspiration so below are a few title cards that I really liked.


Even though Disney still make modern title cards for the films I especially like the old technicolour animations as the style is much more appealing and magical to me. I have taken inspiration from a couple of their title cards and made my own which are shown below! It was really fun making these title cards and in the future I would like to make more if I get to make any more animations that are in this style.


Monday, 18 April 2016

More Progress!

So I am actually done with all of my scenes now and I am so relieved! All I have to do now is piece them all together and come up with my final animation. Below I have put a few line tests.


I had lots of fun animating these two scenes as they were meant to be comedic but also sending the message I wanted to get across about how gender is not something that can be defined by the way you look. These scenes worked really well I found, however if I were to do anything different I would make her corset throw a little quicker as if she put more effort into it. It seems to fly out of the way magically, but the animation is set in a magical world which might just save me! 

Tuesday, 12 April 2016

Progress and Line Tests!

I have been making very good progress with my visual response and overall I am very happy with my outcomes, I have really been focusing on trying to make my animation seem quite comedic and something I am going to have to really think about it the sound I am going to use. Below I have put a few line tests of a couple of scenes I feel I have almost completed so far.


Here is the first walk scene that I have created and I feel like this is progress in comparison to my last project where the walk scene was quite weak and didn't look very natural. My main weakness, however with this scene is the arms seem to move around too much and it is not very natural feeling. If I have time I want to go back and change this but with the deadline being near I'm not sure I will have time to do this.


This scene is one of my favourites as it is the reveal of her true identity, this was really fun to animate and I think I pulled it off quite well as I have never done anything like this before. I feel like there are too many frames when she goes to wipe her face at the very beginning so I might take a few out here to make it a little faster. 

Sunday, 20 March 2016

Disney Framing

Before I start my storyboard I thought it would be a good idea to look at the ways Disney frame their scenes and use this as inspiration. I want to look at the more older examples of Disney films, as this is what I have talked about a lot in my essay.


The first example is from Alice in Wonderland and I really liked this shot as it shows the house in the distance and the character coming out of the forest as if revealing it to the audience. I also really like how the forest is in shadow and the house in the light as it makes it stand out even more. This would be a good shot to use for the first sight of the cottage in my own narrative as my character walks home.


I put in this example as it shows how Disney use a midshot but she is ever so slightly placed to the left of the frame so I will keep this in mind for my own midshots.


This shot I liked because it has a lot of depth to it and I think I would like to use a shot like this as one of my first shots of my character walking through the forest. I like how the trees frame the shot nicely almost encircling the characters.


Finally, this shot is going to be very important to look at as my narrative I want to follow involves my character looking in the mirror and changing from a Princess into something much different in society's eyes. I want to create a very similar look in my own animation and I feel it will be difficult to animate my character twice in one frame.

Disney Scenes - Research


Before going to create my storyboard I wanted to look at scenes that are from Disney films to inspire me and give me some ideas into backgrounds too. The first example I am looking at it is from Beauty and the Beast as this is one of my main inspirations that I want to look at for my colour palette so that my animation looks similar to a Disney animation. This example is very bright and uses lots of oranges, pinks and purples and I want to use these colours in my own cottage to reach a similar atmosphere.

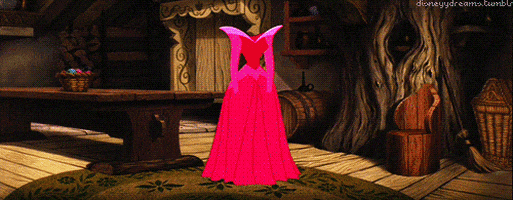
The next example I want to look at is Aurora's cottage because there is lots of examples of different parts of the cottage. I wanted to look at this for inspiration into how my cottage will physically look and use the colour palette from the Beauty and the Beast example to make up my cottage. What I like about this example is the little details on the walls as wallpaper and the painted woos around the house. There is also trees inside the house which I like but I feel like this isn't something I will put in my own cottage as it doesn't really fit my narrative I want to follow. 

In this shot from Aurora's cottage I like the big rug on the floor and I'm going to take this and put it into my own backgrounds to animate on. I also like the use of lots of wood so I want to use this as well to make my cottage very old fashioned but still fitting into the Disney aesthetic.